

What you will need:
- Base Coat (Butter London Nail Foundation)
- Green Nail Polish (Ginger & Liz in Ivy League)
- Nail Art Pens (I used a local beauty supply brand. Try Sally Hansen Pens)
- Quick Dry Topcoat (Sally Hansen Insta-Dri Anti-Chip Topcoat)
- Optional: Glitter Polish

Step 1: Apply a base coat to protect your nails.

I used Butter London Nail Foundation as my base coat of choice.
Step 2: Apply two coats of green nail polish.
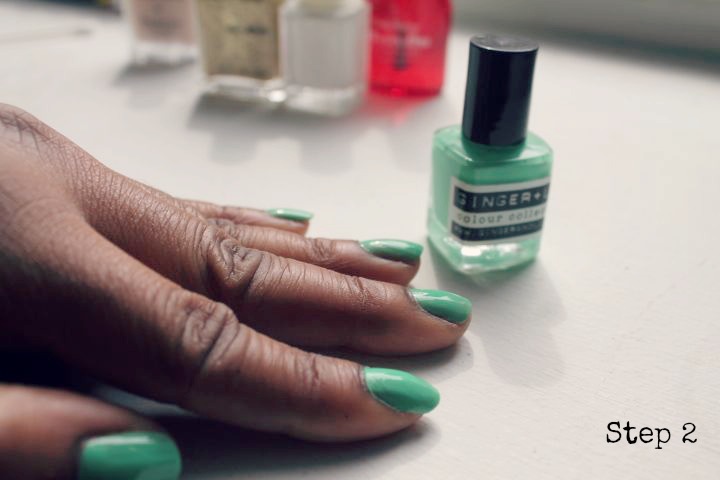

It's a pastel green that's perfect for spring.
Step 3: Use your nail art pens to apply the art designs. Start off with simple designs first, then get more creative as you get used to it.

I started simple with a 3-leaf clover using my white nail art pen, and polka dots. For the clover, I just drew 3 rounded triangles that intersected in the middle, and extended a line from the middle as the stem. This took all of 2 minutes to apply.

Next I used my black nail art pen to draw a pot, and used my glitter nail polish for the flecks of gold. Voila! A pot of gold. I decided to do another nail of polka dots to keep it simple.
Step 4: Apply one coat of Quick Dry Topcoat.

Sally Hansen's Insta-Dri Anti-Chip Topcoat was my topcoat of choice for this. It takes less than 30 seconds to dry, and it helps prevent chipping for up to 10 days.

That's all folks! This was my very first attempt at freehand nail art, and it's not half bad. I am NOT the super talented hand design/sketch type at all, so if I can do this I'm sure you can to! Just pick designs that are simple to execute and pick nail supplies that are good quality.
Shop The Products:
How did are you guys celebrating St. Patrick's Day? Hope you enjoy!
Check out some of our other Style Play Polish Tutorials:


0 comments:
Post a Comment